How to Fix a Shower Head Leak
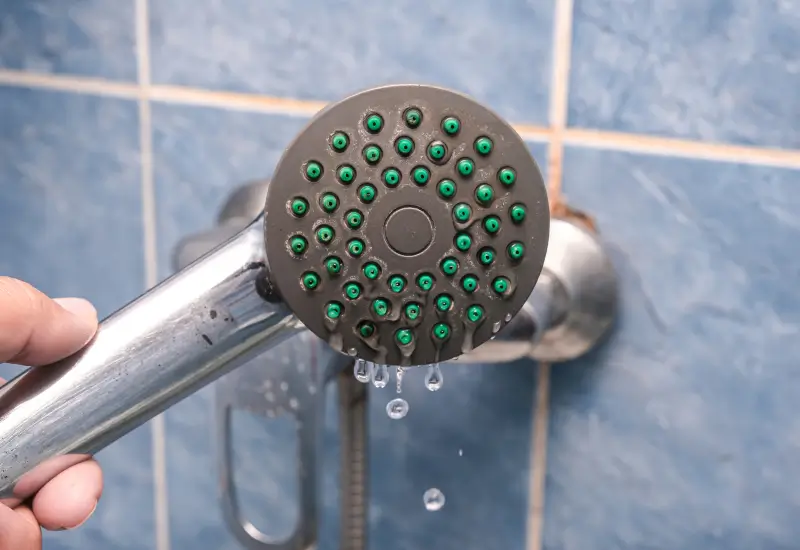
Is your leaky shower head driving you nuts? That slow, steady drip isn’t just annoying—it wastes water and raises your utility bill. The good news is you don’t need to be a plumbing expert to fix it. With a few basic tools and a little patience, you can fix that shower head leak in no time.
Why Is My Shower Head Leaking?
Before grabbing your toolbox, it helps to understand what causes a shower head to leak in the first place. Here are some common culprits:
- Worn-out washers or O-rings: Washers and O-rings create a watertight seal between connections. Over time, they dry out, crack, or lose elasticity, which allows water to escape. If your shower head leaks where it connects to the arm, this is likely the issue.
- Mineral buildup: Calcium and magnesium in hard water is notorious for clogging shower head nozzles, causing water to spray unpredictably. Buildup can also prevent internal components from sealing properly, leading to drips.
- Faulty shower cartridge: Many modern showers use a cartridge inside the faucet handle to regulate water flow and temperature. If it wears out or gets clogged, the shower head may leak when off.
- High water pressure: While low water pressure is more noticeable, high pressure is also problematic because it stresses your plumbing connections and may cause leaks. If you notice multiple leaking fixtures in your home, excessive pressure could be the cause.
- Loose or improper installation: Sometimes, a leaking shower head is simply not screwed on tightly enough or lacks the plumber’s tape to create the proper seal. If you just installed a new shower head and it’s already dripping, double-check the installation.
How to Fix a Shower Leaking from the Shower Head
Now that you know possible reasons why your shower head is leaking, you may be eager to fix it. Follow these steps to get your shower back in working order.
1. Turn Off the Water Supply
To avoid an unexpected spray to the face, start by shutting off the water to the shower. The shutoff valve may be located behind an access panel near the shower, under a nearby sink, or behind the faucet handle trim. In most cases, turning off the main water valve isn’t necessary unless you’re replacing a faucet cartridge.
2. Remove the Shower Head
Unscrew the shower head counterclockwise from the shower arm. Try doing so by hand, but if it’s stuck, wrap a cloth around the connection to protect the finish and loosen it with an adjustable wrench.
3. Inspect and Clean the Shower Head
Once removed, look inside. If you see grime, rust, or white chalky residue, mineral buildup is probably to blame. If the rubber washer appears cracked or misshapen, that’s your culprit. Follow these steps to clean the shower head:
- Fill a bowl with white vinegar and submerge the shower head for at least an hour. Overnight is best. (Note: If your shower head has brass, gold, or nickel finishes, limit the soak to 30 minutes to avoid damage.)
- Use an old toothbrush or toothpick to scrub away loosened debris.
- For stubborn buildup, repeat the process.
- Rinse thoroughly before reinstalling.
4. Replace the Washer or O-Ring
A worn washer or O-ring is one of the most common reasons a shower head starts leaking. Here’s how to replace it:
- Locate the washer inside the shower head where it connects to the arm.
- Use a flathead screwdriver to pry it out carefully.
- Take it to the hardware store to find an exact replacement in the proper size and material.
- Insert the new washer and press it firmly into place.
5. Apply Fresh Plumber’s Tape
Plumber’s tape creates a tight seal between threaded connections. Here’s how to apply it:
- Clean the shower arm threads with a dry cloth.
- Wrap two to three layers of plumber’s tape clockwise around the threads.
- Press it down lightly so it adheres well.
6. Reinstall the Shower Head
After inspecting, cleaning, and repairing your leaky shower head, it’s time to reinstall it. First, screw the shower head back onto the shower arm by hand. Then, gently turn it one final time with a cloth-wrapped wrench. Avoid over-tightening, which can damage the threads or crack internal components.
7. Turn the Water Back On and Test
Restore the water supply, turn the shower on, and check for leaks. If it’s still dripping, try these tips:
- Tighten the connection slightly.
- Remove the shower head and reapply the plumber’s tape.
- Double-check the placement of the washer or O-ring.
When to Get a New Shower Head
Sometimes, fixing an old shower head isn’t worth the trouble. Here’s when to consider replacing it instead:
- Severe corrosion or rust won’t come clean.
- Leaks persist even after replacing washers and O-rings.
- Uneven water pressure remains despite cleaning.
- The shower head casing is cracked or broken.
Preventing Future Shower Head Leaks
Here are some tips to keep your shower head in top shape:
- Periodically remove your shower head and soak it in vinegar to prevent mineral buildup.
- Consider installing a pressure regulator if your home’s water pressure exceeds 80 psi.
- Invest in high-quality fixtures and replacement parts. They might cost more upfront but can save you from leaks and premature replacements.
- Schedule periodic plumbing inspections to catch small issues before they become major problems.
Call the Experts for More Help
If your shower head is still leaking after attempting these fixes, it’s time to call a professional. Expert Plumbing Service draws on over 30 years of experience tackling plumbing problems, both large and small. Our licensed, certified plumbers arrive in fully stocked service trucks, ready to handle everything from shower head repair to full plumbing system diagnostics. For same-day service and 24/7 emergency repairs, please contact us today. We serve DuPage, Will, Kendall, and Kane Counties in Illinois.
Request Your Expert Plumbing Service Today
